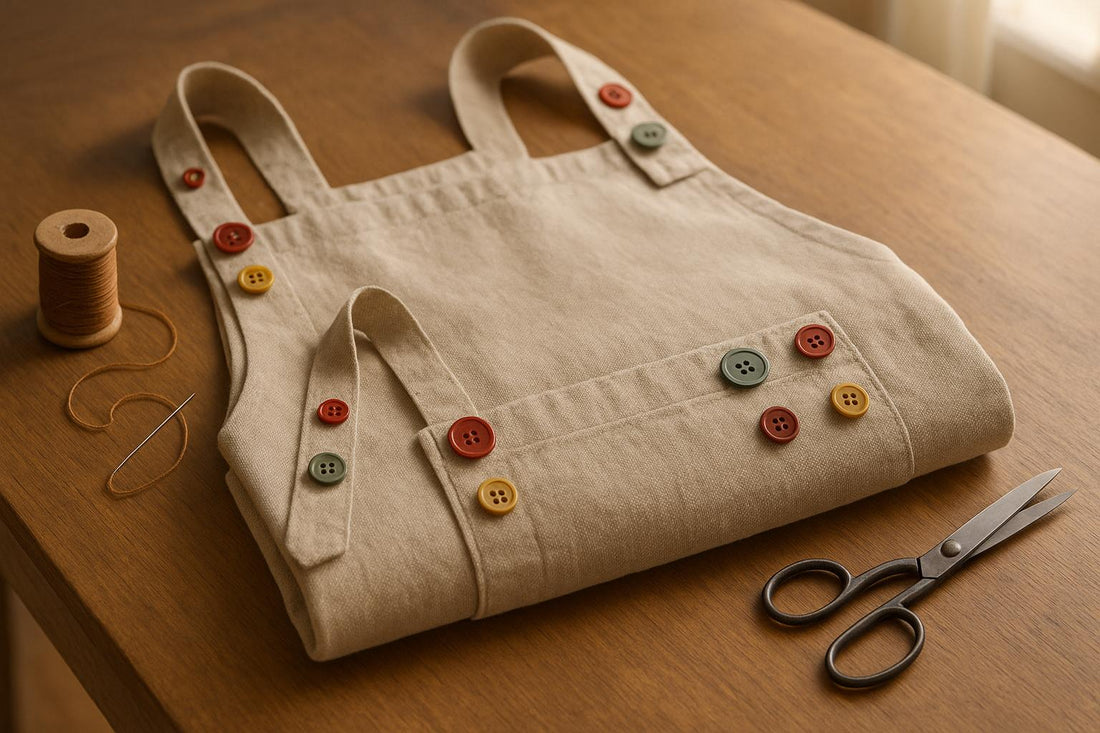
How to Add Button Accents to Aprons
Adding button accents to aprons is a simple way to make them more stylish and practical. Buttons can secure straps, enhance pockets, or serve as decorative details. Here’s how to get started:
- Choose the Right Buttons: Select buttons based on material, size, and style. Metal buttons are durable, plastic ones are lightweight, and wooden or fabric-covered buttons add a unique touch.
- Gather Supplies: You’ll need sewing needles, thread, fabric scissors, measuring tools, and optional items like a thimble or fabric glue.
- Attach Buttons Securely: Sew by hand for precision or use a machine for speed. Reinforce with strong thread and proper techniques to ensure durability.
- Design Layouts: Place buttons strategically for both function and decoration. Experiment with traditional patterns or create custom designs.
- Care and Maintenance: Wash aprons gently, check buttons regularly, and reattach loose ones to keep your apron looking great.
Want a quick tip? For heavy-duty aprons like BBQ styles, use larger, sturdier buttons (up to 1 inch). For lighter kitchen aprons, opt for smaller, lightweight buttons (½–¾ inch).
Adding buttons is an easy way to personalize your apron while improving its functionality. Start with quality materials, experiment with designs, and follow proper care steps to make your apron last.
How to Add a Button Placket to a Garment
Tools and Materials Needed
To achieve professional results, you'll need to gather the right tools and materials.
Required Supplies
- Sewing needles: Choose size 3-7 needles based on your fabric type. For medium to heavyweight fabrics, like Cosmic Aprons' cotton kitchen or heavy-duty BBQ aprons, size 5 or 6 needles are ideal.
- Thread: Use all-purpose polyester thread that matches your fabric or buttons.
- Fabric scissors: Essential for making clean, precise cuts.
- Fabric markers: Opt for fabric chalk or washable markers for marking placements.
- Measuring tape: For accurate measurements.
- Straight pins: To securely hold buttons in place during sewing.
- Buttons: Select decorative or functional buttons that complement your project.
Optional Tools
- Thimble: Protects your fingers while sewing.
- Buttonhole cutter: Creates neat and precise buttonholes.
- Seam ripper: Useful for fixing mistakes or removing old buttons.
- Fabric glue: Provides temporary placement for buttons.
- Fray check: Prevents the edges of buttonholes from fraying.
- Button spacing ruler: Ensures buttons are evenly spaced.
- Needle threader: Makes threading needles faster and easier.
Cosmic Aprons Base Materials
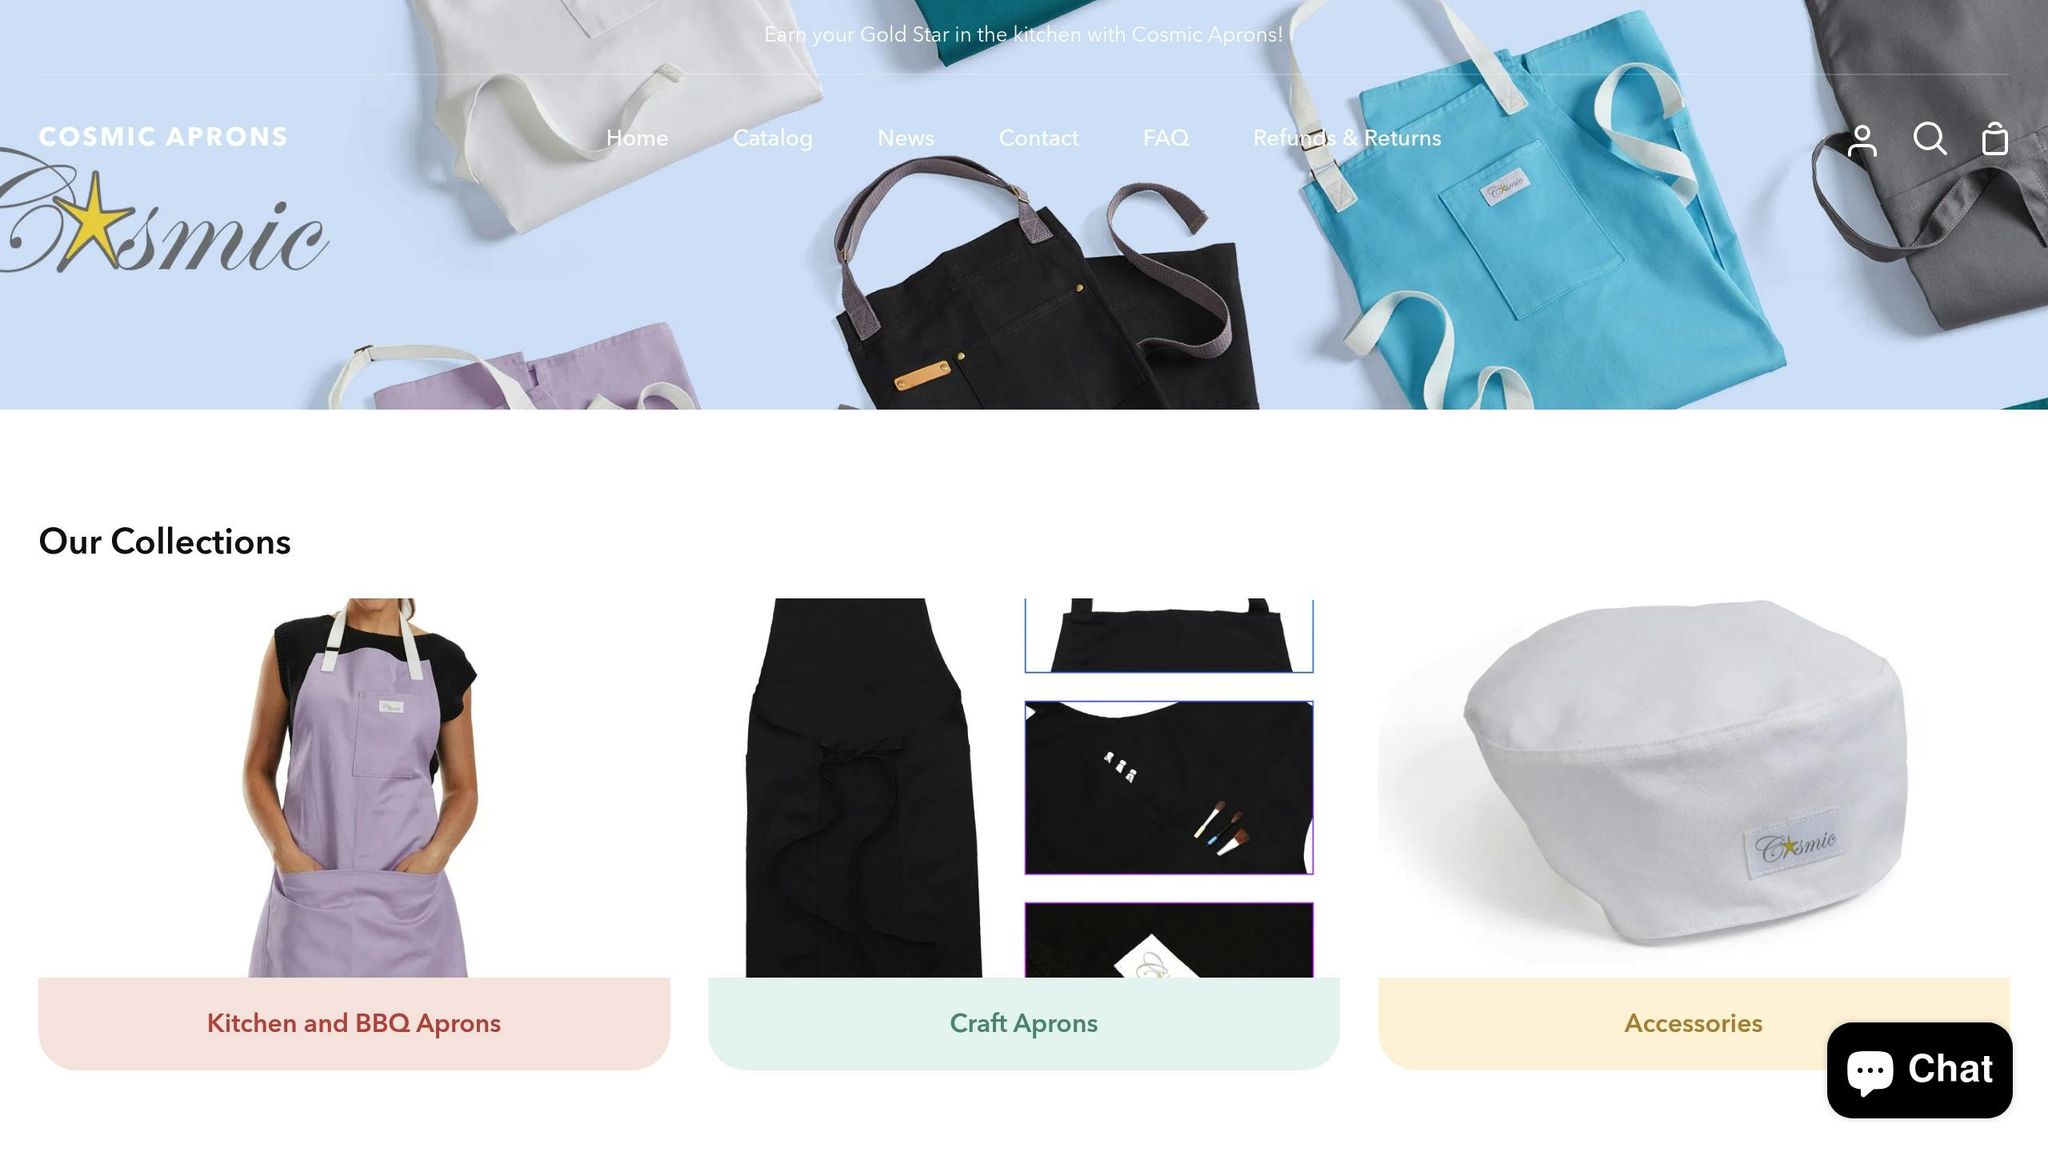
Cosmic Aprons are crafted with high-quality fabrics that are perfect for button attachments. Their cotton kitchen aprons serve as a great medium-weight foundation for decorative buttons, while the heavy-duty BBQ aprons can handle larger, sturdier buttons.
- Cotton aprons pair well with ½-inch to ¾-inch buttons, while heavy-duty aprons can accommodate buttons up to 1 inch.
- Both fabric types are designed to securely maintain button placement.
- The tight weave of the materials minimizes stretching around buttonholes.
For the best results, match your thread to the fabric's weight. Use standard all-purpose thread for cotton aprons and heavier thread for BBQ aprons. This ensures your button accents remain secure and functional, highlighting the quality of Cosmic Aprons' products.
Selecting Buttons
Button Materials and Strength
The material you choose for buttons plays a big role in both durability and style. Here's a breakdown of some popular options:
Metal Buttons
- Perfect for heavy-duty use.
- Built to endure frequent washing and high heat.
- Often available in polished finishes like stainless steel, brass, or nickel-plated, adding a sleek touch.
Plastic Buttons
- Great for everyday use.
- Lightweight and available in a wide range of colors.
- Look for options that offer extra durability and resistance to heat.
Wooden Buttons
- Bring a natural, rustic charm to your designs.
- Ideal for creative or vintage-inspired looks.
Fabric-Covered Buttons
- Blend seamlessly into your design or stand out as a contrasting detail.
- A smart choice if you want buttons that align with the overall fabric aesthetic.
Once you've decided on the material, the next step is to match the button's size and color to your apron design.
Matching Buttons to Aprons
When choosing buttons for your Cosmic Aprons, it’s all about finding the right balance between size, color, and practicality. Here’s how to make the perfect choice:
Size Coordination
- For standard kitchen aprons, ½–¾-inch buttons work well.
- Heavy-duty BBQ aprons benefit from larger buttons, around ¾–1 inch, for added strength.
- If you're aiming for a decorative touch, mixing button sizes can create an eye-catching effect.
Color Selection
- Match buttons to your apron’s main color for a cohesive look.
- Use contrasting colors to make the buttons pop.
- Ensure the buttons complement other design elements, like stitching or patterns.
| Apron Style | Type | Size | Materials |
|---|---|---|---|
| Kitchen | Simple, washable | ½–¾ inch | Plastic, Metal |
| BBQ/Grilling | Heavy-duty | ¾–1 inch | Metal |
| Craft | Decorative | ½–1½ inch | Wood, Fabric |
| Display | Ornamental | Various | Any |
For Cosmic Aprons' cotton kitchen aprons, choose lightweight buttons to avoid pulling or distorting the fabric. If you're working with BBQ aprons, go for sturdier buttons that can handle high heat and regular washing. Always keep the apron’s purpose and care instructions in mind when making your final decision.
Button Attachment Methods
Once you've picked buttons that complement your apron's style, the next step is making sure they’re attached securely. The method you choose will depend on your tools, skills, and the fabric of your apron.
Sewing Buttons by Hand
Hand sewing gives you complete control over where and how your buttons are placed. To do this, carefully position the button, then use strong thread and multiple, evenly spaced stitches to secure it. Adjust your technique based on the thickness and weight of your fabric to ensure a snug fit.
Machine Sewing Buttons
If you're working with multiple buttons or want a faster approach, machine sewing is a great option. Most modern sewing machines come equipped with features that make button attachment simple and efficient.
Using a Button Sewing Foot
- Attach the button foot to your machine.
- Lower the feed dogs to keep your fabric steady.
- Place the button under the foot and align it properly.
- Adjust the stitch width to match the buttonholes.
- Sew 6–8 even stitches to secure each button.
Creating Buttonholes
If your apron design includes functional buttons, you’ll need buttonholes. Many sewing machines have automatic settings for this. Here’s a quick guide:
| Setting | Purpose | Best For |
|---|---|---|
| Standard | Basic buttonholes | Light to medium fabrics |
| Keyhole | Reinforced openings | Heavy-duty aprons |
| Manual | Custom sizes | Specialty buttons |
Once the buttons are sewn, inspect and reinforce them to ensure they can handle regular use.
Making Buttons Stay Put
A secure attachment is key to keeping your buttons in place, especially for aprons that see heavy use. Here are some tips to make sure they last:
Thread Selection
- Use heavy-duty polyester thread for everyday aprons.
- Opt for upholstery thread for BBQ or workshop aprons.
- For an invisible finish, try clear nylon thread.
Reinforcement Tips
- Create thread shanks to give extra room for thick fabrics.
- Add a small drop of fabric glue after sewing for added security.
These steps will help your buttons stay firmly attached, even with frequent use.
sbb-itb-c693c43
Button Layout Options
The placement of buttons can turn a simple apron into a blend of practicality and style.
Standard Button Patterns
Traditional button arrangements are a mix of function and aesthetics. For practical use, buttons should be strategically placed:
- Waistband Connections: Position the first button ¾" from the pointed tie ends, with a second button placed ¼" away from the first.
- Bib Attachments: Use four buttons to secure the bib to the skirt, ensuring stability while adding a decorative touch.
- Neck Ties: Center buttons 2¼" from the top edge and ½" from the sides.
For apron pockets, button placement can enhance both utility and design:
- Standard Pockets: Add decorative buttons to the upper section without compromising functionality.
- Wraparound Pockets: Place buttons at division points for added reinforcement.
- Larger Pockets: Use corner buttons to define sections and improve structure.
These classic layouts prioritize usability, but you can always experiment with unconventional placements to create a more personalized design.
Custom Button Designs
While standard patterns are practical, custom designs allow for a touch of creativity without losing functionality.
Professional Kitchen Designs
For a durable apron, reinforce buttons at high-stress areas while avoiding spots where they might snag on kitchen equipment.
Home Kitchen Artistry
Add a playful or seasonal flair with themed buttons:
- Spring: Floral shapes
- Summer: Sun motifs
- Fall: Leaf patterns
- Winter: Snowflake designs
You could also arrange buttons to resemble chef’s hats or crossed utensils, blending professionalism with whimsy.
Button Spacing Guidelines
- Close Spacing (under ½"): Creates a more formal, polished appearance.
- Standard Spacing (¾" to 1"): Achieves a balanced and versatile look.
- Wide Spacing (over 1"): Gives a relaxed, casual vibe.
For reversible aprons, symmetrical button placement is key. Position buttons ½" to ¾" from the edges. Neutral-colored buttons or matching pairs on both sides work well for dual-sided designs.
When deciding on button density, consider the fabric pattern. Minimal accents complement busy prints, while solid fabrics can handle more intricate arrangements. These thoughtful layout choices, paired with secure attachment techniques, ensure your apron is both functional and visually appealing.
Caring for Buttoned Aprons
Keeping your buttoned aprons in top shape ensures they stay functional and stylish. Here’s how you can maintain their look and durability.
Cleaning Instructions
- Turn the apron inside out before washing and place it in a mesh laundry bag to minimize wear on the fabric and buttons.
- Stick to mild detergents - steer clear of bleach or fabric softeners.
- Air-dry by hanging the apron on a padded hanger or laying it flat to avoid unnecessary stretching.
- If you prefer using a dryer, set it to the lowest heat setting and remove the apron while it’s still slightly damp to prevent shrinkage.
Button Maintenance
Check your buttons regularly to make sure they’re securely attached. If you notice any that are loose, reattach them right away using matching thread. Reinforce the stitches to keep the button firmly in place and evenly balanced. If you own a product from Cosmic Aprons, there are additional steps to ensure long-lasting durability.
Cosmic Aprons Maintenance
Cosmic Aprons are built to last, but proper care can make them last even longer:
- Stick to mild detergents to protect the fabric and buttons.
- Store the apron flat or hang it up to reduce stress on the buttons.
- When ironing, use a low heat setting and avoid direct contact with the buttons.
- For added durability, use interfacing to strengthen attachment points when sewing buttons.
- If stains appear near the buttons, gently spot clean with a soft brush and a mild soap solution.
Conclusion: Your Custom Button Design
Adding buttons to your apron is a great way to make it both functional and personal. Start with a strong base, like the Cosmic Aprons' Professional Grade Chef Apron (priced at $26.00), to ensure a solid foundation for your design.
Here are a few key things to keep in mind:
- Material Compatibility: Choose buttons that work well with your apron's fabric and can handle its care requirements.
- Strategic Placement: Position buttons in areas with less movement to avoid them getting in the way during use.
- Ease of Maintenance: Opt for buttons that align with the cleaning needs of your apron for convenience.
These details tie into the overall design process. Start with a simple plan, experiment with button placement, and use interfacing to secure them for long-term durability. With a little planning, your apron won't just be a practical kitchen tool - it'll also reflect your personal style.
FAQs
How can I creatively use button accents to enhance the look and functionality of an apron?
Adding button accents to aprons is a fun and simple way to bring a touch of personality and practicality to them. Buttons can act as decorative highlights, adding color and charm, or serve practical purposes, like fastening adjustable straps or securing pocket closures.
Start by selecting buttons that complement the apron’s fabric and overall vibe. For instance, wooden buttons can add a rustic flair, while colorful plastic ones can make the apron feel more playful and lively. You can sew buttons onto pocket flaps, along the straps, or even arrange them in decorative patterns to make the apron stand out. For a functional twist, consider using buttons to create adjustable neck or waist straps, making it easy to achieve the perfect fit.
If you’re on the hunt for aprons to personalize, Cosmic Aprons has an impressive selection. From lightweight cotton kitchen aprons to sturdy BBQ designs, their collection includes adjustable straps and pockets - ideal for adding your own creative touches.
How can I make sure the buttons I add to my apron stay secure through daily use and washing?
To keep the buttons on your apron firmly in place, opt for a strong, durable thread like polyester or heavy-duty thread. Make several passes with the thread while sewing to ensure the buttons are securely attached. For added strength, you can apply a tiny drop of fabric glue or fray check to the thread knots on the back of the fabric.
When it’s time to wash your apron, turn it inside out and choose a gentle cycle to reduce stress on the buttons. If your apron is made from tough, heavy materials, handwashing might be a better choice to protect both the fabric and the decorative details.
How do I choose the right button materials and sizes for an apron based on its style and purpose?
When choosing buttons for your apron, it’s important to think about both practicality and appearance. For everyday kitchen aprons, medium-sized buttons (about 1/2 inch) made from lightweight materials like plastic or resin are a great choice. They’re durable, easy to clean, and won’t weigh the apron down. On the other hand, for heavy-duty aprons - like those used for BBQs or crafting - sturdier options such as metal or wood are better suited to handle wear and tear. Larger buttons (3/4 inch or more) can also serve as a decorative element, adding a bold flair.
Consider the apron’s purpose when selecting button styles. Decorative aprons can feature more elaborate designs, while functional aprons benefit from simpler, more practical buttons. Make sure the button size matches the thickness of the fabric and doesn’t interfere with key features like adjustable straps or pockets.