Step-by-Step Guide to Pasta Dough Preparation
Share
Making pasta dough at home is simple, satisfying, and puts you in control of the ingredients. Here's a quick breakdown of how to do it:
- Ingredients: All-purpose, "00", or semolina flour, eggs, salt, and olive oil. Use 100g flour and 1 egg per serving.
- Tools: Mixing bowl, rolling pin or pasta machine, bench scraper, and clean workspace.
- Process: Mix flour and eggs, knead until smooth, let the dough rest, then roll and shape.
- Tips: Adjust hydration as needed, rest the dough to relax gluten, and use semolina for dusting.
Whether you're aiming for silky noodles or hearty shapes, this guide covers every step, from mixing to troubleshooting. Homemade pasta cooks faster and tastes better than store-bought - try it and see!
Easy Homemade Pasta Recipe - A Step-by-Step Guide
Tools and Ingredients You Need
Getting ready to make fresh pasta? You don’t need a lot of fancy gadgets, but having the right essentials makes the process smoother and more enjoyable. Here's what you'll need to get started.
Main Ingredients
Fresh pasta is all about simplicity, so quality ingredients are key. The type of flour you use will have the biggest influence on the texture and flavor of your noodles.
- All-purpose flour: This is the go-to option for beginners. It’s easy to find and creates pasta with a slightly firmer texture, similar to dried pasta. For a standard batch serving four, measure out 2 cups (240g).
- "00" flour: For that silky, smooth texture Italian pasta is famous for, this finely milled flour is your best bet. It’s soft enough for delicate noodles but sturdy enough to roll thin. Use the same amount - 2 cups (240g).
"Since fresh pasta is mostly made of flour, the type you choose can have a profound impact on your results. Want a soft and silky noodle? How about a chewy noodle with some bite? Choosing the right pasta flour will help you get there."
- Rossi Anastopoulo, Employee-owner since 2020, King Arthur Baking
- Semolina flour: If you’re aiming for heartier pasta like pappardelle or rigatoni, semolina is your friend. It adds a nutty flavor, a golden color, and a chewy texture that holds up to thick sauces.
- Fresh eggs: Use 3-4 large eggs (at room temperature) for every 2 cups of flour. The eggs add richness and help create a tender dough.
- Salt and olive oil: Add 1/2 teaspoon of salt to enhance flavor and strengthen the gluten. A drizzle of olive oil (1-2 tablespoons) can make the dough easier to handle and adds a touch of richness.
With these simple ingredients, you’re ready to mix up a dough that’s as delicious as it is versatile.
Required Tools
Having the right tools on hand not only simplifies the process but also makes it more enjoyable. Here’s what you’ll need:
- Large mixing bowl: Stainless steel or glass bowls are ideal for combining your ingredients without making a mess. They’re easy to clean and won’t retain odors.
- Bench scraper: This tool is a lifesaver for gathering sticky dough, cleaning your work surface, and portioning the dough for rolling.
- Rolling pin or pasta machine: A pasta machine ensures consistently thin sheets with minimal effort, but a sturdy wooden rolling pin works just as well if you’re ready to put in a little elbow grease. Look for a pin without handles for better control.
- Clean kitchen towels: Keep two on hand - one for covering the dough while it rests and another for dusting your work area.
- Clear work surface: Make sure you have at least 2 feet of counter space for kneading and rolling. A clutter-free area is essential.
- Kitchen apron: Pasta-making can get messy, so a good apron is a must. Cosmic Aprons offers durable cotton aprons with adjustable straps and pockets, perfect for keeping tools like your bench scraper within reach.
- Sharp knife or pizza cutter: These are great for trimming edges and cutting the dough into your desired shapes.
- Extra flour: Keep a small bowl of flour nearby for dusting. It’ll come in handy to prevent sticking during every step of the process.
With these tools and ingredients gathered, you’re all set to dive into the art of pasta-making. Let’s get rolling - literally!
Mixing and Forming the Dough
With your ingredients and tools ready, it's time to turn simple flour and eggs into pasta dough. This step is where everything begins to take shape, laying the groundwork for your homemade pasta.
The basic guideline for pasta dough is 100 grams of flour and 1 large egg per serving. For a family of four, this translates to 400 grams of flour (about 3 cups) and 4 large eggs. If you prefer ratios, pasta expert Michael Ruhlman suggests a 3:2 ratio of flour to egg, which creates a slightly richer dough. For consistency, it's best to weigh your ingredients. For example, professional pasta maker Meryl Feinstein uses a go-to recipe of 350 grams of '00' flour, 50 grams of semolina flour, and 225 grams of eggs for 4 servings. Similarly, The Clever Carrot notes that 3 large eggs plus 1 yolk should weigh 185 grams when cracked. Armed with these measurements, let’s dive into how to mix the dough, whether by hand or with modern appliances.
Hand Mixing Method
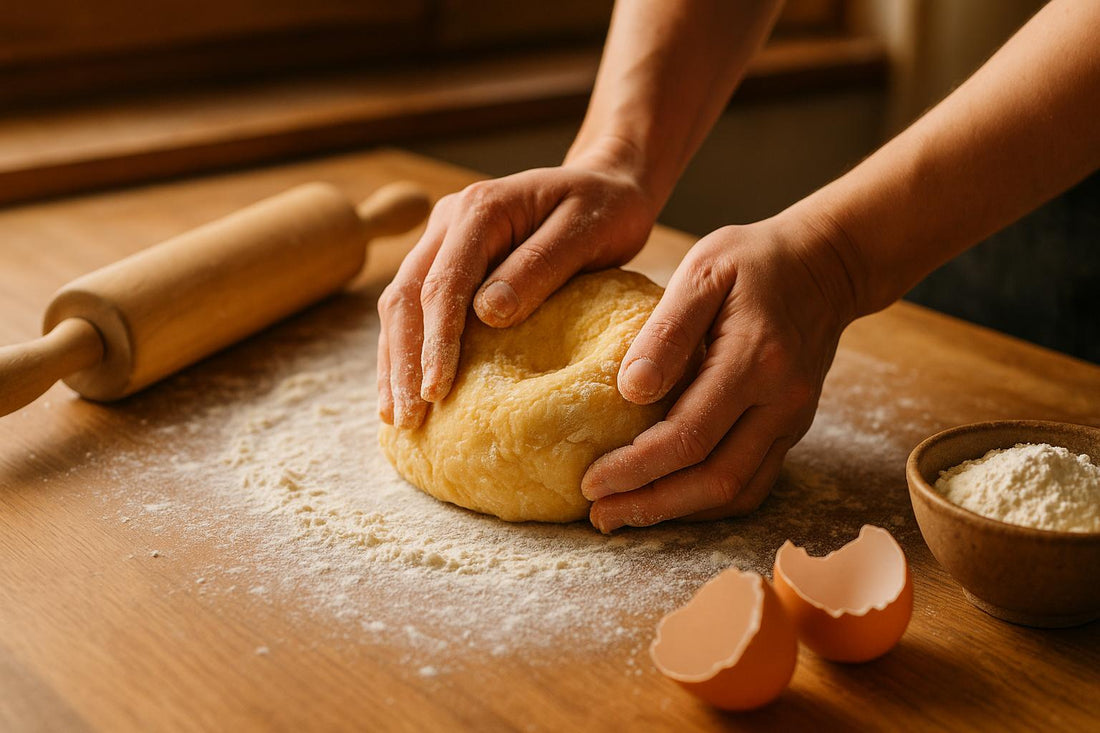
Mixing by hand is a classic approach that gives you full control over the dough's texture. Start by making a well in a mound of flour on a clean work surface. Crack the eggs into the center and add a pinch of salt. Use a fork to beat the eggs gently, gradually pulling in flour from the edges of the well. Taking it slow prevents the mixture from spilling onto your counter.
Once the mixture becomes too thick to stir with a fork, switch to your hands. At first, the dough might look a bit rough and shaggy - this is completely normal. Keep working in the flour until the dough comes together into a ball. If it feels too dry, add a few drops of water or olive oil until it reaches the right consistency. This process typically takes about 5–8 minutes and gives you a true feel for the dough.
For some extra flair while you work, check out Cosmic Aprons (https://cosmicaprons.com) for aprons that keep your clothes clean while adding a touch of style to your kitchen adventures.
Other Mixing Methods
If hand mixing feels too labor-intensive or you’re making a large batch, modern appliances can help streamline the process. Both food processors and stand mixers are excellent tools, each with its own benefits.
- Food Processors: These can mix your dough in under 3 minutes. Simply pulse the flour and eggs until the mixture resembles coarse crumbs, then process until a ball forms. Be careful not to over-process, as the high speed can make the dough rubbery.
- Stand Mixers: Perfect for larger batches, stand mixers offer more control. Use the dough hook on low speed for about 5 minutes to combine the ingredients without overworking the dough.
Your choice of method depends on your batch size and personal preference. For smaller portions (2–4 servings), hand mixing connects you to the traditional craft. But if you’re making pasta frequently or in larger quantities, appliances can save you time and effort.
Kneading and Resting the Dough
Once your dough is well-mixed, the next step is kneading - a crucial process that transforms your mixture into a smooth, elastic dough that's perfect for shaping. Kneading activates gluten, the protein that gives pasta its signature stretch and satisfying bite.
How to Knead the Dough
Kneading is all about developing that gluten structure. To do it right, press the heel of your hand into the dough, push it forward, give it a 45° turn, and repeat. Keep this rhythm going for about 10 minutes. By the end, your dough should feel smooth, elastic, and springy when lightly pressed.
"Mixing by hand guarantees that you can adjust your dough as you're working, ultimately allowing you to develop your ideal texture with greater precision." - Niki Achitoff-Gray, Former Editor-in-Chief at Serious Eats
Pay attention to how the dough feels as you knead. If it's too wet or sticky, sprinkle in a bit more flour. If it seems dry or crumbly, add a small amount of water - just a few drops at a time. You'll know you've nailed it when the dough is uniform in color, smooth, slightly tacky but not sticky, and springs back when pressed. This bounce-back is a sign that the gluten network is fully developed. Be cautious not to under-knead, as this can leave bubbles or bits of unincorporated flour in the dough, which may affect the final texture.
Once your dough feels just right - smooth, elastic, and bouncy - it's time to let it rest.
Why Resting Matters
Resting is just as important as kneading. After all that effort, this step allows the gluten to relax, making the dough easier to roll and shape. As Sarah Ubertaccio, Founder of q.b. Cucina, puts it:
"When the gluten relaxes, the dough will become stretchable and will hold its shape." - Sarah Ubertaccio, Founder of q.b. Cucina
sbb-itb-c693c43
Rolling and Shaping the Dough
Once your dough has been kneaded and rested, it’s time to transform it into thin sheets and shape it into pasta using precise techniques.
Preparing the Dough for Rolling
Start by clearing a long workspace - pasta sheets can stretch up to 3 feet in length. Divide your rested dough into smaller portions, typically 4 to 6 pieces, to make it easier to handle. Cover the portions you're not using with a damp kitchen towel to prevent them from drying out. Take one piece and flatten it into an oval disc; this shape feeds more evenly through a pasta machine.
Dust your work area, sheet pan, and pasta machine generously with semolina flour. While all-purpose flour can work, semolina is better because it absorbs less moisture, reducing the risk of sticking.
Using a Pasta Machine or Rolling Pin
If you’re using a pasta machine, begin with the widest setting (usually labeled 1 or 0). Feed your flattened dough disc through the rollers several times on this setting to create a smooth, uniform texture. Once the dough feels consistent, move to thinner settings gradually, running the dough through each setting twice before progressing to the next.
For ravioli or other delicate pasta, aim for a thinness of 1 to 1.2 millimeters - thinner than 1/16 of an inch but slightly thicker than a credit card. On an Atlas Marcato 150, this corresponds to settings 6 or 7, while on a KitchenAid roller attachment, settings 5 or 6 are ideal. When properly rolled, the dough should appear very thin and slightly translucent - you should be able to faintly see your hand through it.
If you’re rolling by hand, cut the dough into smaller pieces for easier handling. Roll from the center outward, rotating the dough frequently to ensure even thickness. This method takes patience and strength, especially if you're aiming for ultra-thin sheets for ravioli, but it offers complete control over the process.
Once your dough reaches the desired thinness, you’re ready to cut and shape it.
Cutting and Storing Pasta Shapes
Before cutting your pasta sheets, let them rest for 5–15 minutes to semi-dry. This helps prevent the cut pieces from sticking together.
For long noodles like fettuccine or tagliatelle, lightly dust the sheets with flour before cutting. Use the cutting attachment on your pasta machine or fold the sheet loosely and slice it by hand with a sharp knife. After cutting, toss the strands with semolina flour and form small nests by gathering a few strands together.
If you’re storing pasta for short-term use (up to 2 hours), arrange it on a parchment-lined baking sheet generously dusted with semolina flour. Make sure the pieces don’t touch each other. For refrigerator storage (up to 24 hours), place the pasta in an airtight container lined with parchment paper, separating layers with additional parchment and a sprinkling of semolina flour.
For long-term storage, freezing is your best bet. Lay the pasta in a single layer on a parchment-lined, semolina-dusted baking sheet and freeze uncovered for about 1 hour, until the pieces harden. Then transfer the pasta to an airtight freezer bag. When cooking frozen pasta, just add an extra 30–60 seconds to the cooking time.
For stuffed pasta like ravioli, blanch the filled pieces in boiling water for 30 seconds, then let them air dry for 15 minutes. Freeze them on a semolina-dusted, parchment-lined baking sheet before transferring to freezer bags.
Keep in mind that fresh pasta cooks much faster than dried store-bought varieties, so adjust your cooking times accordingly. Fresh pasta is ready in just minutes, making it a quick and rewarding option for any meal.
Troubleshooting and Tips for Success
Even seasoned home cooks can run into hiccups when making pasta dough. Knowing how to troubleshoot and fix these issues will help you create consistently great pasta every time.
Common Dough Problems and Solutions
Many pasta dough problems come down to hydration levels and environmental factors. Here's a quick guide to tackling the most frequent challenges:
| Problem | Solution | Preventative Tip |
|---|---|---|
| Dry, crumbly dough | Moisten your hands and knead for 30 seconds. Use a fine mist spray bottle to lightly add water and wait a moment. | Stick to a 55–57% hydration ratio and measure ingredients by weight for accuracy. |
| Too sticky/wet | Add flour one tablespoon at a time until the dough becomes workable. | Weigh your ingredients and consider room humidity when mixing. |
| Tough, hard to knead | Wrap the dough in plastic wrap and let it rest for 15–20 minutes at room temperature. | Allow enough resting time from the start to relax the gluten. Avoid rushing. |
Once you've mastered these fixes, a few extra tips can help elevate your pasta dough game.
Tips for Best Results
Take your pasta-making to the next level with these practical tips:
- Mind the Temperature: Room temperature plays a big role in how your dough behaves. If your kitchen is on the cooler side, you might need to let the dough rest a little longer. In warmer conditions, the dough may turn sticky, so adjust accordingly.
- Organize Your Space: A clutter-free workspace makes all the difference. Use a kitchen scale to weigh your ingredients for consistent results - flour density can vary, making volume measurements less reliable. And for convenience, consider wearing a good apron, like those from Cosmic Aprons, which have deep pockets to keep your tools handy.
- Know Your Flour: Different types of flour absorb moisture differently. Italian "00" flour, for instance, might need a touch more liquid than all-purpose flour. Whole wheat flour, on the other hand, often requires extra hydration to achieve the right texture.
- Let It Rest: Resting the dough is non-negotiable. This step relaxes the gluten, making the dough easier to roll and shape. If the dough feels overly tough, wrapping it in plastic and letting it rest for 15–20 minutes can work wonders.
- Learn as You Go: Every batch of pasta dough is a learning experience. Pay attention to the dough's texture and elasticity - it will guide you in fine-tuning your technique over time.
With these solutions and tips in your back pocket, you'll be well on your way to mastering pasta dough like a pro.
Conclusion
Making pasta dough from scratch is a skill that connects you to a rich culinary tradition. By following the key steps - from gathering simple ingredients like flour, eggs, and salt to mixing, kneading, resting, and rolling - you can create smooth, elastic dough that transforms into delicious pasta. Once you've got the basics down, there's a whole world of possibilities to explore.
For starters, try experimenting with different flours to change the texture and flavor. Semolina flour adds a nutty depth, while "00" flour creates an incredibly silky finish.
You can also get creative with pasta shapes and sauce pairings. Long, thin noodles pair well with light, oil-based sauces, while sturdier, ridged shapes like penne are perfect for holding chunky, hearty sauces. If you're feeling adventurous, use molds or cutters to craft unique shapes, turning your kitchen into a space for edible artistry.
"Making pasta from scratch is not only a fun and rewarding experience but it also offer several surprising benefits." - Silvana Lanzetta
Don't forget to set up your workspace for success. A durable kitchen apron, like those from Cosmic Aprons, can keep you clean and organized with its handy pockets for tools. Their adjustable straps and sturdy materials are ideal for the hands-on nature of pasta-making. Beyond the practical benefits, the repetitive motions of kneading and rolling can be surprisingly meditative, helping you focus and find a sense of calm. With time and practice, you'll develop an intuitive feel for the dough and uncover your own favorite techniques and flavor combinations.
FAQs
How do different types of flour affect the texture and flavor of pasta dough?
The kind of flour you choose for your pasta dough plays a big role in its texture and taste. Semolina and durum wheat flours are popular picks because they create a dough that's firm, elastic, and has a slightly nutty flavor - ideal for shaping and holding up during cooking. Mixing flours, like combining soft wheat with durum, can give you a smoother or chewier texture while adding more depth to the flavor. Whole grain flours add a hearty, nutty taste and a denser texture, making the pasta richer and more satisfying.
Trying out different types of flour allows you to tailor your pasta to your liking, whether you prefer silky, delicate strands or rustic, hearty shapes. To get the best results, stick to high-quality ingredients and tweak your flour mix depending on the type of pasta you’re crafting.
What should I do if my pasta dough is too dry or too sticky while kneading?
If your pasta dough feels dry, try adding a little water - about a tablespoon at a time - until it comes together smoothly. Just be cautious not to overdo it, as too much water can turn the dough sticky.
On the other hand, if the dough feels sticky, lightly dust it with flour or semolina and keep kneading until it’s easier to work with. By making small adjustments and kneading thoroughly, you’ll get the ideal consistency for rolling and shaping your pasta.
How can I store fresh pasta to keep it fresh and maintain its quality?
To keep your fresh pasta in top condition, it's important to store it correctly based on when you plan to use it:
- For short-term use: Store the pasta in an airtight container in the refrigerator. Aim to use it within 2–3 days to retain its best flavor and texture.
- For longer storage: Freeze the pasta in an airtight container or freezer bag to protect it from freezer burn. This method keeps it good for several months.
- Drying for room-temperature storage: If you'd rather store pasta at room temperature, make sure it's completely dried. Once dried, store it in a cool, dark place. Properly dried pasta can last for several months or even up to a year.
No matter which method you choose, using an airtight container is crucial to preserving the pasta's quality and preventing it from spoiling.