How to Use Paint-Your-Own Apron Kits for DIY Projects
Share
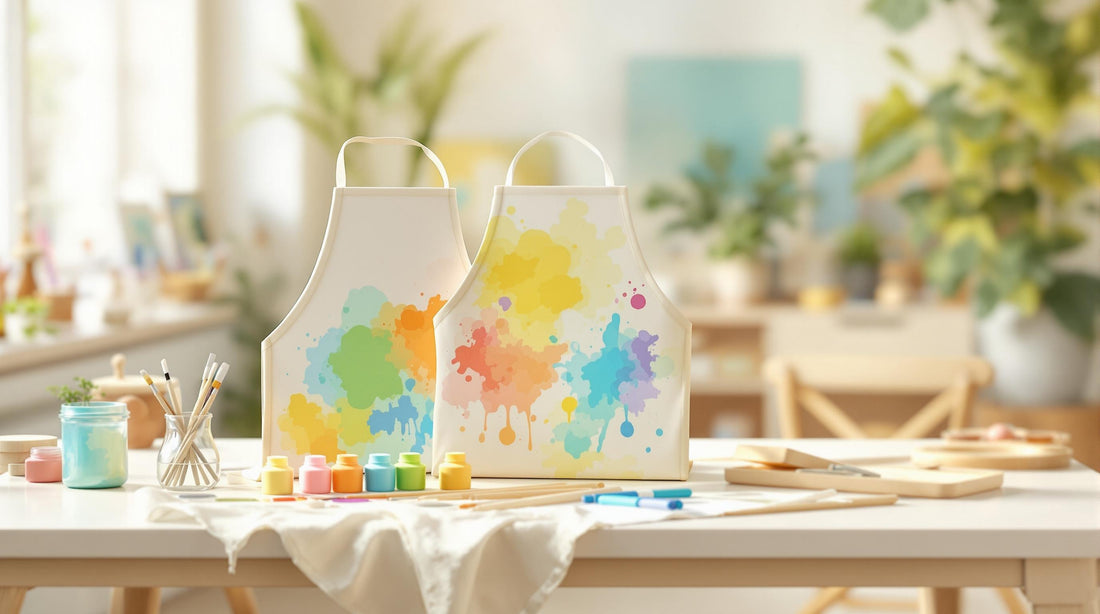
Want to create a personalized apron that’s both stylish and functional? Paint-your-own apron kits make it easy. These kits are perfect for home chefs, crafters, professionals, and families looking for a fun DIY activity. Here’s what you need to know:
- Why customize? Add personal touches like names, logos, or unique patterns.
- Who can use them? Great for anyone - from cooks to craft lovers.
- How to start? Choose a durable cotton apron, prep it by washing and ironing, and set up a clean workspace.
- Painting tips: Use fabric paint, stencils for clean designs, and layer colors for depth.
- Care instructions: Heat-set the paint, wash gently, and store properly to keep your design intact.
Whether you’re making a custom kitchen apron or a workshop essential, this guide covers everything from preparation to durability tips. Let’s dive in!
1. Preparing Your Apron for Painting
1.1 Choosing the Right Apron and Kit
Picking the right apron is crucial for a smooth painting experience. Here's what to keep in mind:
| Feature | Why It Matters | What to Look For |
|---|---|---|
| Material | Durability and comfort | 100% cotton, pre-shrunk fabric |
| Size | Proper fit and coverage | Adjustable straps, full coverage |
| Design | Convenience | Multiple pockets, reinforced stitching |
| Surface | Ideal for painting | Smooth, unwrinkled texture |
For painting projects, go for sturdy cotton aprons with strong stitching and plenty of coverage to protect your clothes.
1.2 Preparing the Apron
Getting your apron ready before painting helps ensure your design stays intact and looks polished. Follow these steps:
- Pre-wash the apron: Wash it in cold water without fabric softener to get rid of any residues that might interfere with the paint. Let it dry completely before moving on.
- Smooth the surface: Iron the apron thoroughly, paying extra attention to seams, edges, and pockets. This ensures a flat, smooth area for painting.
- Set up your workspace: Choose a clean, protected area to work. Lay the apron flat and insert a snug piece of cardboard between the layers to stop paint from bleeding through.
Once your apron is ready, you're all set to dive into painting and bring your creative ideas to life!
Painting My Apron | HOW TO GIVE A BLACK APRON A MAKEOVER!
2. Techniques for Painting Your Apron
Your apron is prepped - now it’s time to bring your ideas to life with some paint and creativity.
2.1 Selecting Paint and Tools
The type of paint and tools you choose can make or break your design. For long-lasting results, go with fabric paint made for textiles. If you’re using acrylic paint, mix in a fabric medium to help it stick better, stay flexible, and avoid cracking when the apron is washed or worn.
| Tool | Purpose |
|---|---|
| Fabric Paint or Acrylic + Fabric Medium | Covering large areas, base designs |
| Flat and Fine-tip Brushes, Fabric Markers | Adding details, filling backgrounds |
| Palette, Water Container, Paper Towels | Mixing colors, cleaning brushes |
2.2 Using Stencils and Patterns
Stencils are a great way to create clean, polished designs, even if you’re just starting out. Tape the stencil securely in place, use a ruler to align it if needed, and apply paint with a light tapping motion to avoid smudging. Let each section dry fully before working on the next to keep your design neat.
2.3 Adding Personal Details
Start with lighter colors and layer darker tones to add depth. If you’re going freehand, practice on scrap fabric first to get a feel for your design. Use small brushes for detailed work and build your design gradually. If you’re new to painting, stick to simple shapes or patterns at first. Once you’re comfortable, try out different techniques and color combinations to make your apron stand out.
When your masterpiece is finished, you’ll want to take a few steps to ensure it stands up to wear and washing.
sbb-itb-c693c43
3. Ensuring Durability and Care of Your Painted Apron
After putting in the effort to personalize your apron, taking the right steps can keep your design looking sharp and long-lasting.
3.1 Setting the Paint
To make sure your design stays intact and resists fading or cracking, follow these steps:
- Lay a clean cloth over your painted design. Adjust your iron to the temperature recommended for the fabric. Iron gently but firmly over the cloth, ensuring even heat across the design.
- Allow the apron to cool completely after ironing. This helps secure the paint to the fabric.
3.2 Cleaning and Storing
Taking care of your apron properly will keep your artwork in great condition:
| Care Aspect | Do's | Don'ts |
|---|---|---|
| Washing | Use cold water and mild detergent | Avoid hot water or strong chemicals |
| Drying | Air dry or use a low-heat dryer setting | Avoid direct sunlight exposure |
| Storage | Hang or fold neatly in a dry space | Don’t keep it in damp or humid areas |
Wash your apron only when necessary - usually after 5–10 uses. Turn it inside out before washing and opt for a gentle machine cycle or hand wash. Skip bleach and fabric softeners, as they can damage both the paint and the fabric.
When storing, choose a cool, dry spot away from sunlight and moisture. If you notice any cracks or fading in the paint, touch up the affected areas with a fabric sealant.
Conclusion: Using Paint-Your-Own Apron Kits
Paint-your-own apron kits combine creativity and functionality, letting you turn an everyday item into a personalized piece of art. With the right preparation, painting techniques, and care, your apron can become a durable and unique expression of your style.
A self-designed apron is more than just practical - it’s a way to showcase your creativity. Whether you're in the kitchen, tending to your garden, or working on crafts, your custom apron adds a personal touch to your activities. These kits open up endless design options, from simple initials to detailed patterns.
Why Choosing a Quality Apron Matters
A well-made apron not only makes painting easier but also helps your design last through constant use and washing. Brands like Cosmic Aprons offer a reliable base for your artistic efforts.
When picking an apron for painting, focus on these important features:
| Feature | Benefit | Impact on Paint Project |
|---|---|---|
| Material Quality | Ensures better adhesion | Keeps designs intact over time |
| Construction | Provides a polished look | Retains shape after washing |
| Adjustable Features | Offers a comfortable fit | Helps with even paint application |
Investing in a good apron pays off both immediately and in the long run. High-quality options with adjustable straps and reinforced pockets not only make painting easier but also ensure your personalized creation can handle daily wear while keeping its artistic charm.
FAQs
Here are answers to some common questions to help you with your apron painting project.
How do I paint on an apron?
Start by laying your apron flat on a protected surface. Prepare small amounts of fabric or acrylic paint on a palette for easy access. Use brushes suited for your design, and let the paint dry completely before handling or setting it.
What kind of paint should I use?
Fabric and acrylic paints work well because they stick to the material and keep their color after washing. Washable paints are easier to clean but may not last as long, making them better for kids' projects.
How can I make my design last?
Take these steps to keep your design intact:
| Step | What to Do | Why It Helps |
|---|---|---|
| Setting Paint | Heat-set the paint | Locks in the design |
| Washing | Use cold water on a gentle cycle | Reduces fading and wear |
| Drying | Lay flat or hang by straps | Keeps the shape and prevents cracks |
What safety measures should I follow?
Work in a well-ventilated area and cover your workspace with newspaper. If kids are involved, supervise them to ensure safe handling of paints. Keep cleaning supplies nearby for quick spill cleanup.
Can I fix mistakes while painting?
If the paint is still wet, use a damp brush to correct it. For dried paint, wait until the base layer is fully dry, then paint over the mistake.
How should I store my painted apron?
After the paint is dry and set, store your apron flat or hang it in a cool, dry place away from direct sunlight to avoid fading.
These tips will help you create and care for your painted apron like a pro!