How to Tie Apron Bows
Share
Tying an apron bow isn’t just practical - it’s a chance to add style to your everyday tasks. From cooking to crafting, a secure and neat bow keeps your apron in place while enhancing your overall look. Here's what you need to know:
- Why It Matters: A proper bow prevents your apron from shifting or coming undone and adds a polished touch to your outfit.
- Bow Styles: Choose from classic, double, or decorative bows depending on your apron type - kitchen, BBQ, or craft.
- Preparation Tips: Adjust straps evenly and make sure ties are smooth for a balanced bow.
- Care Tips: Wash and store aprons properly to maintain their quality and keep bows looking sharp.
Whether you’re tying a simple bow for everyday use or a decorative one for special occasions, the key is even straps, secure knots, and thoughtful placement. For aprons designed to make tying bows easier, check out options with adjustable straps and durable fabrics.
How to Tie Apron
Tools and Preparation
Getting that perfect apron bow starts with a little preparation. The good news? You don’t need any fancy gadgets - just your apron and a few everyday items you probably already have on hand.
Tools and Materials
The centerpiece of this process is your apron with ties. Most aprons come with built-in fabric ties, but the material and width can vary. If you’re new to this, cotton ties might be your best bet - they’re heavier and wider, making them easier to handle. On the other hand, nylon ties are lighter and more flexible but may require a bit more skill to work with.
Adjustable straps are another handy feature to look out for. They help you fine-tune the fit, making it easier to achieve a neat, balanced bow.
Want to elevate your bow’s look? Consider adding optional ribbons. Different ribbon types behave differently when tied:
- Wired nylon ribbon holds its shape well, making it ideal for a crisp, structured bow.
- Satin ribbon looks smooth and elegant but can be tricky to knot. If you go this route, small slits on either side of the bow can help reduce tension.
- Grosgrain ribbon has a ribbed, matte texture and can be a bit stiff. For this type, a simple shoelace-style bow often works best.
Once you’ve gathered your materials, it’s time to prep your apron for a flawless finish.
Preparing the Apron
A little preparation goes a long way in achieving a tidy and secure bow. Start by putting on your apron and adjusting the neck strap for a comfortable fit.
"Adjust the neck properly and smooth out the fabric."
The neck strap should allow the apron to rest naturally across your chest without pulling or bunching. Smooth out any wrinkles in the fabric to avoid uneven ties.
Next, focus on the waist straps. Pull them forward and check that they’re equal in length - uneven straps are a common culprit behind lopsided bows. If one strap is longer, readjust the neck strap or reposition the apron until both sides match.
Make sure the waist straps are long enough to wrap securely around your waist with enough material left for tying. For extended wear, you might want to use a double bow technique for added security, so ensure the straps are long enough to accommodate this.
Taking a few moments to properly prepare your apron can turn a rushed, messy look into one that’s polished and comfortable, no matter how long you’re wearing it.
How to Tie Apron Bows
Once your apron is in place, the next step is learning how to tie the perfect bow. Whether you're going for a simple, functional look or something a bit more decorative, these techniques will help you achieve a clean and secure finish. Many aprons from Cosmic Aprons come with adjustable straps, making it easier to tie stylish bows.
Classic Bow
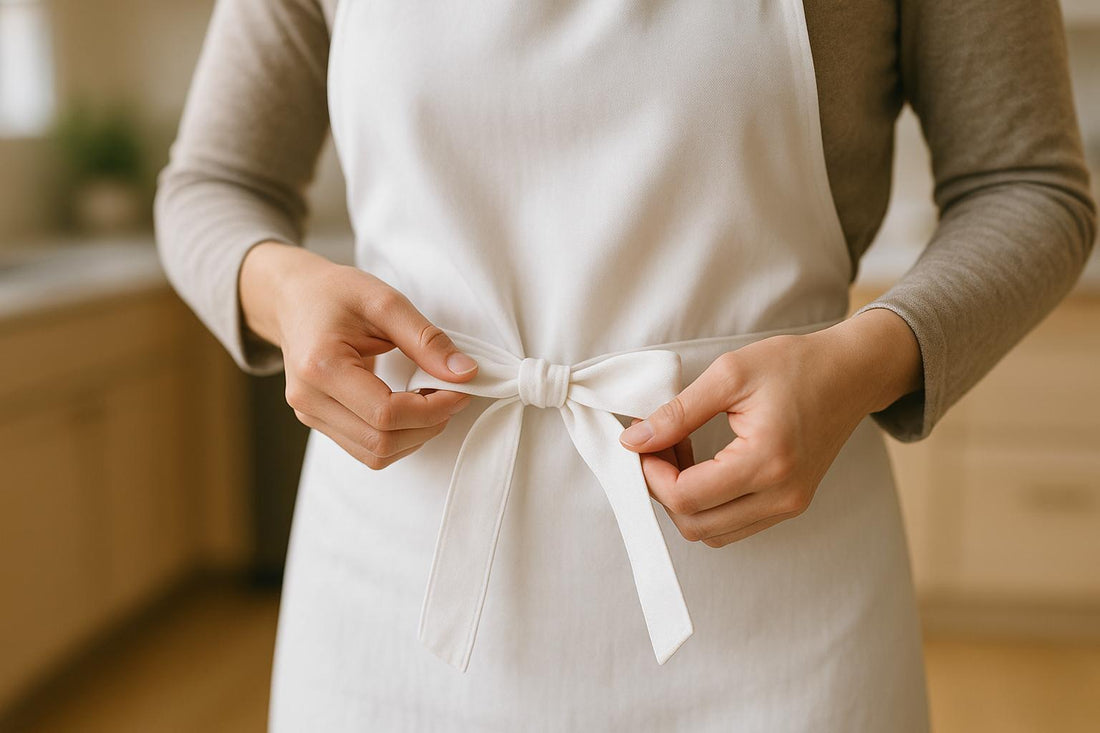
The classic bow is a go-to option for everyday use. It’s quick, secure, and works well with any apron style.
Wrap the apron ties evenly around your waist, ensuring both ends reach your back or side. Check that the straps are the same length before moving on.
Cross the right tie over the left, then pull it under and through to form a knot. Tighten the knot until it’s snug but not overly tight - you’ll need some flexibility to create the loops.
Take one tie and fold it into a loop, holding it steady. Wrap the other tie over the front of the loop, bring it around the back, and pull it through to form a second loop. Tighten the bow by pulling both loops, then adjust them and the tails until everything is even and lies flat.
For a more secure or decorative option, you can try the double bow.
Double Bow
If you want added stability or a bit of flair, the double bow is a great choice. Begin by following the same steps as the classic bow, but leave extra length in the ties.
Once the first bow is complete, use the remaining tails to form a second bow. To keep everything looking neat, start the second bow at the bottom of the tie that hangs naturally. This ensures both layers are consistent in size and shape. Tighten the bow carefully - too much force can leave it looking uneven or bulky.
Decorative Layered Bow
For special occasions or when you want to add a personal touch, a decorative layered bow is the way to go. Start by tying a basic bow using the classic method. Once it’s secure, choose a decorative ribbon - satin, grosgrain, or wired nylon all work well - and layer it over your existing bow.
Make sure the decorative ribbon starts with both ends evenly matched. Form a second bow using the same loop-and-wrap technique. If you’re using wired nylon ribbon, adjust the loops to create a crisp, structured look. For satin ribbon, you might want to cut small slits on the sides to reduce tension and avoid puckering. Trim any excess ribbon for a polished finish.
This approach not only customizes your apron but also enhances its overall appearance.
Fixing Common Problems
No matter which bow style you choose, it’s important to troubleshoot any issues to achieve a neat, secure result.
- Uneven loops: These usually happen if the ties start out uneven or if you pull too hard on one side. Untie the bow and start over, paying close attention to the strap lengths.
- Loose knots: If your knot keeps slipping, it’s likely the first knot wasn’t tight enough. Make sure the initial crossover knot is firm before forming the loops.
- Lopsided bows: This can occur if one tail is significantly longer than the other or if the bow isn’t centered. Check your apron’s position and strap lengths before tying.
- Sliding bows: If your bow shifts to one side while you’re wearing the apron, try tying it slightly off-center in the opposite direction. As you move, it should naturally settle into the middle.
With these tips and techniques, you’ll be tying perfect apron bows in no time!
sbb-itb-c693c43
Bow Placement and Style Tips
The way you tie and place your bow can influence both the practicality and the overall appearance of your apron. These tips will help you refine your tying techniques for a polished look and better functionality.
Where to Place Your Bow
Front placement is often the most convenient option. It allows you to see what you're doing, make quick adjustments, and ensure the bow is tied evenly. That said, tying your apron at the front isn't ideal for chefs or anyone working near hot stoves or machinery. Dangling straps can become a safety hazard. In professional kitchens, a common trick is to tie the bow visibly at the front, then lift the apron and tuck the ties underneath for a clean and safe finish.
Back placement keeps the straps out of your way and is a great choice for formal settings or when safety is a concern. While it might take a bit of practice to tie a bow behind your back, mastering this technique is worth it for a more professional and polished appearance.
Matching Bow Style to Your Apron
Your bow style should complement your apron's material and purpose. For example, a simple, classic bow works well with lightweight cotton aprons, while a sturdy double bow is better suited for heavy-duty BBQ aprons.
If you’re wearing a craft apron, you can get creative with decorative, layered bows. These add a touch of flair without compromising function. Since crafting typically involves less movement, you can experiment with ribbon overlays or structured bow designs to suit your style.
For everyday tasks, go with a basic bow that’s quick to tie and untie. Hosting a dinner party or attending a formal event? Take the extra time to create a neat, symmetrical bow to elevate your look.
The type of apron ties you’re working with also matters. Cotton ties are ideal for simple bows, while satin or decorative ties are better for intricate styles. Adjustable straps, like those featured on many Cosmic Aprons designs, let you customize the length of the ties, making it easier to achieve the perfect bow.
Finally, consider the width and length of your apron ties. Wider ties create fuller, more dramatic bows, which can sometimes feel overwhelming on smaller frames. Narrower ties, on the other hand, provide a sleek, professional look and work well with a double bow for added security.
Caring for Apron Bows
Taking care of your apron properly ensures it stays in great shape and keeps your bow looking sharp. A neatly tied and well-maintained bow not only adds to your overall appearance but also stays secure throughout the day.
Keeping Bows Neat During Use
To keep your apron bow looking tidy, retie it periodically during the day. This quick adjustment helps maintain a polished look. Once you've mastered keeping it neat, follow these cleaning tips to preserve the bow's shape and your apron’s overall condition.
Washing and Storage
Pre-wash Tips
Before washing, tie the apron strings to prevent tangling. Empty all pockets, and always check the care label for specific instructions. If your apron is garment-dyed, wash it separately to avoid color transfer.
Washing Guidelines
The best washing method depends on the material. For delicate or embroidered aprons, hand washing is ideal. Everyday cotton aprons, however, can be machine washed without issue. Use cold water to prevent colors from running and fabrics from shrinking. Opt for a mild detergent without bleach or harsh chemicals, and skip fabric softeners to protect the material.
If you’re using a washing machine, place the apron in a mesh laundry bag to safeguard it from rough agitation. This is especially important for aprons with decorative elements or delicate bows. Choose a gentle cycle and avoid overloading the machine.
Drying Techniques
Air drying is the safest option to prevent shrinkage. If you must use a dryer, set it to the lowest heat setting. High heat can damage synthetic fabrics and cause cotton to shrink unevenly.
Ironing and Pressing
For a crisp, professional look, iron your apron inside out on a low heat setting without steam. Pay special attention to the tie areas. If your apron is made of synthetic material, use an even lower temperature to avoid melting or scorching.
Proper Storage
To keep your apron wrinkle-free, hang it up when not in use. A hanger with clips works best to keep everything in place. Store your apron in a cool, dry area, away from direct sunlight, dust, and moisture. For delicate fabrics, either hang or lay the apron flat to avoid creases. If folding is necessary, follow natural fold lines and steer clear of embroidered areas.
Special Care for Specific Aprons
Some aprons require extra attention. Waxed canvas aprons, for instance, should only be spot cleaned with a damp cloth - never machine washed or ironed. If your apron features intricate embroidery or beadwork, store it flat in a protective case to avoid damaging the decorative details.
Conclusion
Tying apron bows doesn’t have to be complicated. With the right approach and a well-made apron, you can create secure, stylish bows that are both functional and visually appealing.
Key Takeaways
The process of tying a perfect apron bow is all about preparation, technique, and maintenance. Each step, from starting with untangled ties to ensuring proper tension, plays a role in achieving a flawless result.
A well-tied bow isn’t just practical - it adds a polished touch to your cooking or crafting ensemble. Whether you go for a classic bow for everyday wear, a double bow for added security, or a layered bow for special occasions, the essentials remain the same: neat ties, consistent tension, and thoughtful placement. For example, tying the bow in the back offers a clean, streamlined look, while tying it in the front allows for quick adjustments.
Features like adjustable straps and extra-long waist ties make the process even easier. As one satisfied customer shared:
"I'm delighted with the fabric, the adjustable neck strap, and the extra-long waist ties." - Listening Woman
Durable fabrics, especially those that are waterproof and oil-proof, ensure your apron stays clean and your bow stays neat throughout the day. Regular care, including gentle washing and proper storage, helps maintain both the apron’s quality and the sharpness of your bow.
For aprons designed with convenience and style in mind, check out Cosmic Aprons. Their adjustable straps, long ties, and durable materials make tying perfect bows a breeze.
FAQs
How can I tie an apron bow securely, especially if I’m new to wearing aprons?
Tying an apron bow securely doesn’t have to be tricky. Start by adjusting the straps so they sit comfortably on your shoulders. Next, cross the straps behind your back and pull them around to the front. Tie them into a bow, ensuring it’s snug enough to stay in place but not so tight that it restricts your movement.
For extra stability, tie the bow slightly above your waistline - this helps keep it from slipping as you go about your tasks. Once tied, take a moment to adjust the loops and ends so the bow looks neat and stays secure. With just a bit of practice, you'll have a bow that’s both functional and tidy!
How can I keep my apron bow neat and even all day?
To keep your apron bow neat and balanced, start by making sure both straps are the same length before tying. This sets up a balanced base for your bow. When tying, pull it snugly and adjust the loops and tails so they’re evenly sized. For added hold, consider double-knotting the bow to keep it secure. Throughout the day, check and tweak the bow as needed to maintain its shape and prevent it from slipping or looking uneven.
What are the best fabrics for apron ties to create neat and easy-to-tie bows?
When it comes to apron ties, lightweight and flexible fabrics like cotton, linen, or cotton twill are your best bet. These materials are not only easy to tie but also hold their shape nicely, ensuring your bows stay secure and look tidy.
Cotton and linen stand out for their comfort and durability, making them ideal for everyday wear. Cotton twill, on the other hand, offers a bit more thickness and strength while remaining simple to work with. These fabrics not only make tying knots effortless but also give your apron a clean, polished appearance.